Edit Appointment Details
|
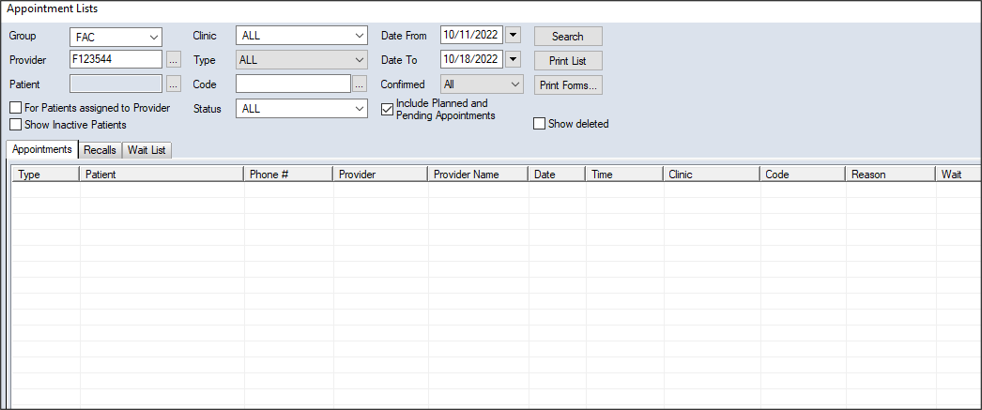
Sometimes you must make changes to appointments that include editing appointment details. You can edit appointment details from the Scheduler > Active, Pending, Weekly, or Availability tab and the Appointment Lists window > Appointments or Wait List tab. Important: Only use the Availability tab if working in Availability mode. To edit appointment details:
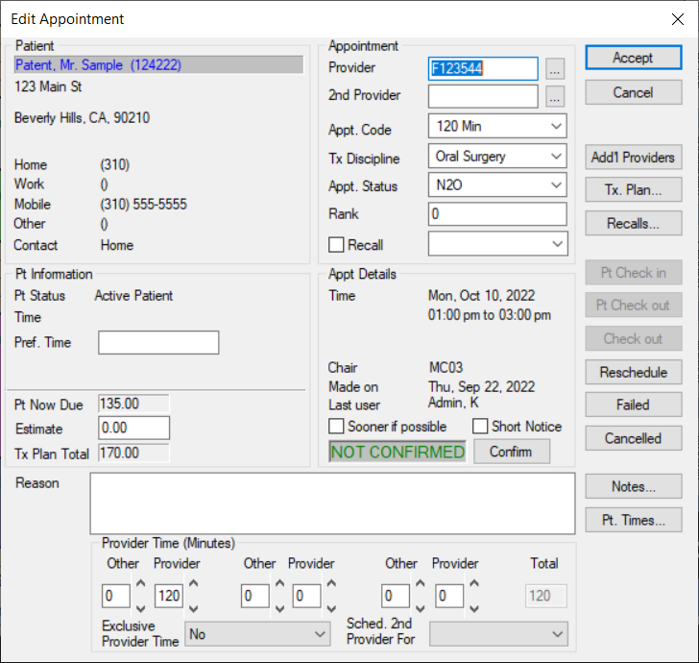
Tip: You can also double-click the appointment to display the window.
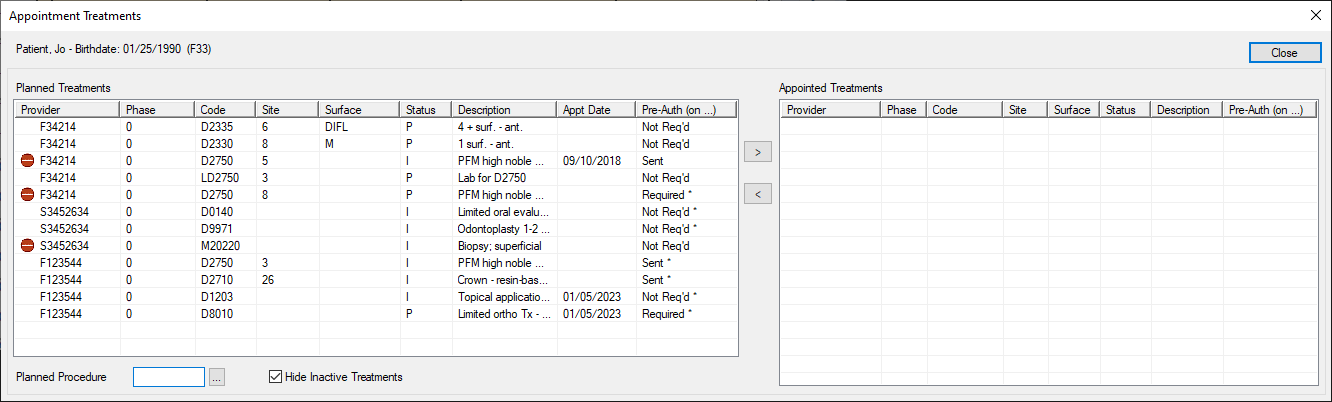
Note: This button only displays if the Scheduler Options window > Appt Entry Window field is set to Advanced. The appointment text also displays in blue in the Scheduler to indicate that the appointment is confirmed. If a primary provider has additional assistants/providers attending the appointment, you can assign them to the appointment. This prevents them from being booked into appointments at the same time but does not book them into a chair. Tip: This is useful in clinics when there is one treating provider and multiple observing providers. Tip: To remove a provider, select a listed provider and click the < button. In the Scheduler > Active tab, the additional providers/assistants have horizontal lines display down the left side of the appointment block and they are indicated in the appointment with a + icon. Planned treatments for the patient display in the left pane and appointed treatments that have been assigned to an appointment display in the right pane. Note: Only approved planned treatments display. Tip: If you want to display all planned treatments, deselect the Hide Inactive Treatments checkbox.
Note: This button only displays if the Scheduler Options window > Appt Entry Window field is set to Advanced. It is only enabled if the appointment is active or signed in and scheduled for today. The patient’s name displays in red text to indicate they are checked in to a clinic. Note: This button only displays if the Scheduler Options window > Appt Entry Window field is set to Advanced. The patient is checked out of the Patients module and their name displays in the Scheduler in gray text to indicate they are checked out of their appointment. Note: This button only displays if the Scheduler Options window > Appt Entry Window field is set to Advanced. It is only enabled if the appointment is checked in. Important: Just as you can select patients for use only in the Scheduler, you can also check out patients only in the Scheduler. This is referred to as checking out the appointment. If you check out an appointment, the patient remains checked in in the Patients module. The patient’s name displays in the Scheduler in gray text to indicate their appointment has been checked out, but they remain displayed in red in the Patients module to indicate they are still checked in. Note: This button only displays if the Scheduler Options window > Appt Entry Window field is set to Advanced. It is only enabled if the appointment is active or signed in. Note: This button only displays if the Scheduler Options window > Appt Entry Window field is set to Advanced. It is enabled if the appointment is active, signed in, checked in, or checked out. Note: This button only displays if the Scheduler Options window > Appt Entry Window field is set to Advanced. It is enabled if the appointment is active, signed in, checked in, or checked out.
|