Manage Inventory Orders
|
Inventory orders are the main way to move products into and around the Inventory module. Tip: If necessary, you can also move product without an order. Pending orders sometimes require modifications. If necessary, you can edit pending orders, cancel items within orders, or cancel entire orders. When necessary, you can open an internal or external pending order and make modifications including the following:
Note: Some actions may only be available for certain types of orders. Example: You can only mark external orders as purchased. To edit order details:
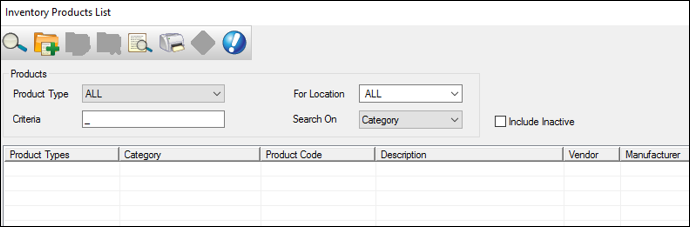
Note: Some fields are only available for specific order types. Note: The Find Product window displays if you are editing an internal order and the Inventory Products List window displays if you are editing an external order. Note: The Search button is present if you are editing an internal order and the Search for Data ( Tip: The Need by field defaults to the date used for last product added to the order. You can modify the date if necessary. Note: Only external orders can be marked as purchased. Your institution may require you to indicate each item in an internal order has been reviewed.
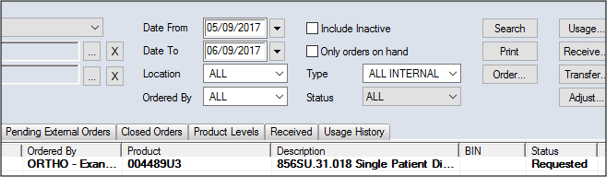
Example: From the Location drop-down list, select the Main Warehouse and from the Status drop-down list, select Requested.
The item text becomes unbolded, the status changes to Reviewed. Your institution may require you to indicate each item in an internal order has been ordered.
Example: From the Location drop-down list, select the Main Warehouse and from the Status drop-down list, select Reviewed. The item status changes to Ordered. If an internal order has been placed and the main warehouse does not have the right amount of product to fill the order, the product must be given the status of Back-order. This means an external order must be placed with a vendor and received before the internal order can be filled. To mark an item as back-ordered:
The item text changes to red. It will remain in the Pending Internal Orders tab until the back-order has been received and the order can be updated. Note: In the Product Levels tab, the item displays in green as a reminder that the item is on back-order. In certain situations, you can cancel an ordered item. Example: Over-ordering a product. Important: You cannot cancel items after the order has been partially filled or received. Note: If you must cancel an entire order, see Manage Inventory Orders. To cancel an item:
The item text changes to gray and the status changes to Cancelled. Tip: You can view all cancelled items from the Closed Orders tab. In certain situations, you can cancel a pending order. Example: Over-ordering several products. Important: You cannot cancel orders after the order has been partially filled or received. To cancel an order:
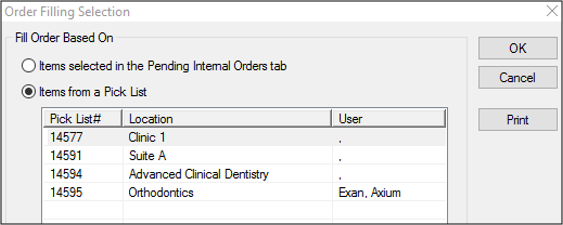
The order is cancelled and all item text changes to gray.All item text changes to gray and the statuses change to Cancelled. Tip: You can view all cancelled orders from the Closed Orders tab. When internal orders are requested or ready to be delivered within your institution, you must complete the order. This can be done by filling internal orders and, when necessary, substituting internal order products. If your institution uses pick lists to fill internal orders, you must locate the correct order and print the pick list before you fill the order. Note: Not all institutions require a printed pick list. Only print the pick list if your institution follows a conventional, shopping list setup that requires you to gather all items before filling the order. After an internal order has been made and the pick list has been printed (if necessary), you can fill the order and update the Inventory module. Note: The requested from location is usually, but not all always, a main warehouse location. The process to fill internal orders will vary depending on the institution’s setup:
As part of the filling process, you must physically retrieve the internal order contents and make them ready to deliver them to the location that ordered them. To fill an internal order:
Tip: To select multiple items, press Ctrl. Note: The item(s) you select is only relevant if you will fill the order without using a pick list. The pick list prints and the order’s status changes to Picked.
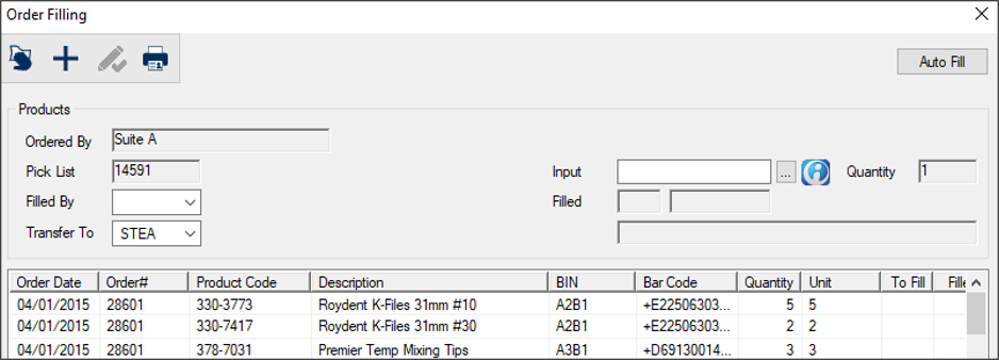
Note: This opens the order products(s) you selected before you clicked Fill.... The Order Filling window displays with the item(s) listed.
Tip: Each item listed in the order may display a BIN to indicate where the item is stored. You can click the BIN column header to sort the products by BIN and (if applicable) match how pick lists are organized. Next to each item, the Filled column displays the value entered in the Quantity column. Note: Only use this method if all ordered products are present. Across from the list item, the To Fill column changes to 0 and the Filled column reflects the quantity filled. Note: If only a partial order can be filled, enter the amount you have available. Example: If the location ordered 50 boxes of gloves, but are only 25 are available, enter 25. The item text changes to red to indicate it is on back-order. In the Closed Orders tab, the order’s status changes to Filled. Note: If the order was partially filled, it remains under the Pending Internal Orders tab and the status reads Back-ordered. In the Product Levels tab, the Quantity number reduces for that item, showing the new remaining number for the main warehouse. The receiver can now deliver the item(s). If you are unable to fill an internal order from the main warehouse, it may be necessary to substitute another item for the item on the pick list. After an internal order has been reviewed and a pick list has been printed, you must use the printed pick list to fill an internal order from the main warehouse, and update the Inventory module.
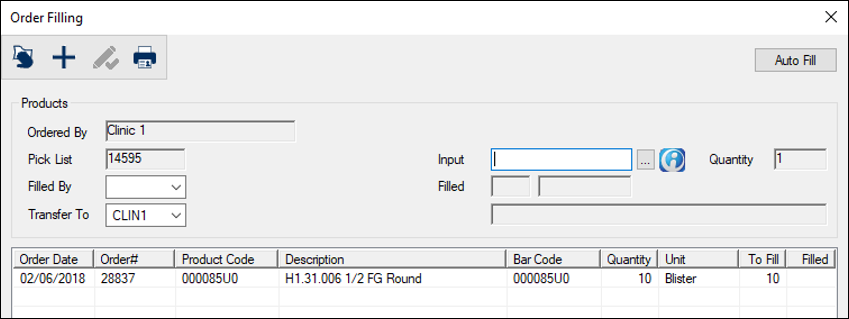
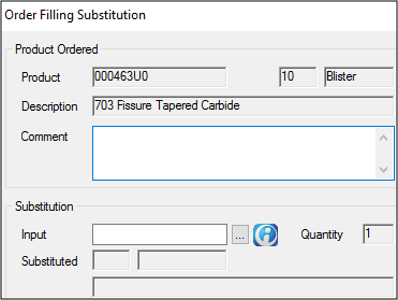
The Order Filling window displays with the item in the list.
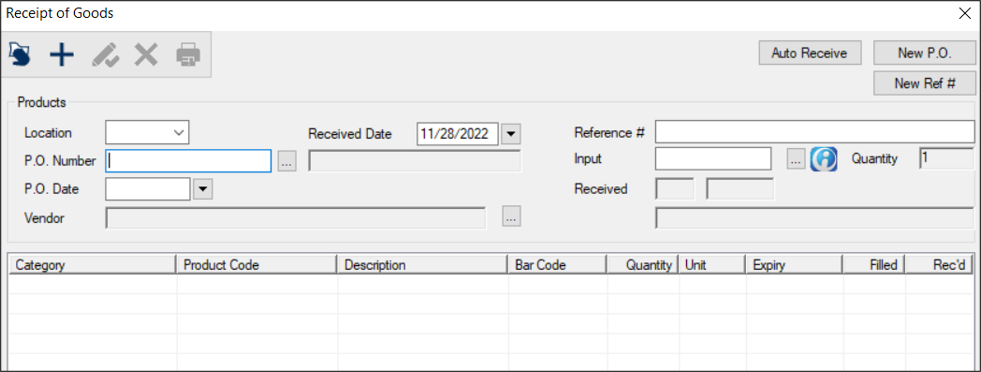
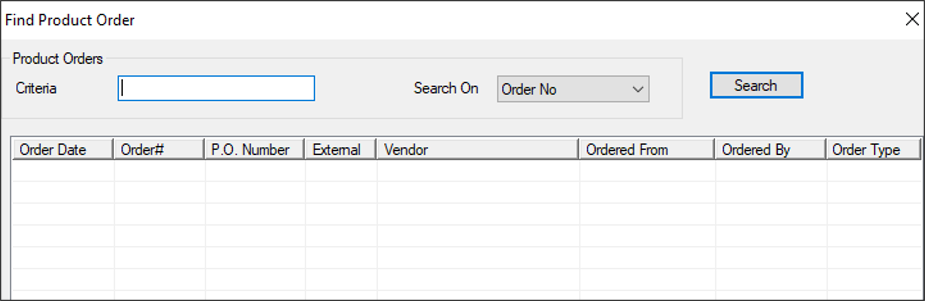
The Product and Description fields are auto-populated with the product being substituted. The content is auto-pulled into the Substituted fields. When external orders have arrived at your institution, you must complete the order. You can receive external orders, complete external orders that are set to Partial Fill, fill special orders, and close items. When an external vendor’s shipment arrives, you must receive the order and review each order item so they are registered in Inventory. Tip: You can search for orders using the order number, P.O. date, or P.O. number. Note: The P.O. Number field allows a maximum of 20 characters.
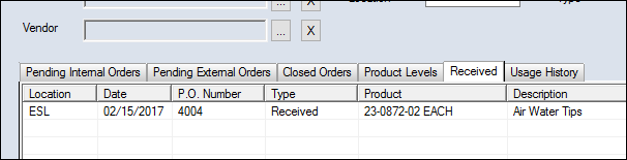
Tip: If present, note the P.O. Number column value for the arrived order(s).
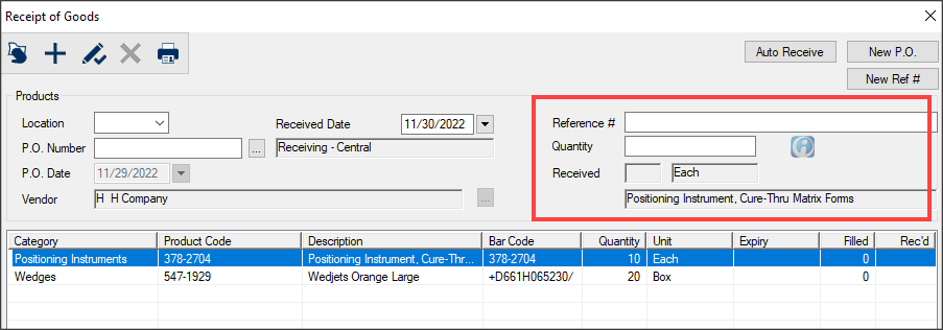
If an expiry date is associated with the list item, a Product Expiry window displays. The expiry date displays in the Expiry column for that item. Note: If you entered list items manually, you can skip to the end of the procedure. The Input field becomes the Quantity field and the Received fields reflect the item’s unit type and description.
Note: If entered, this number can be used later for reporting purposes. The number populates in the Received field, and across from each lower list item, the Filled and Rec’d column values reflect the value entered. Note: If only a partial order for a product arrived, enter the amount you received. Example: If you ordered 50 boxes of film tabs and you only received 25, enter 25 in the Quantity field. If an expiry date is associated with the list item, a Product Expiry window displays. The expiry date displays in the Expiry column for that item. The entry text changes to red to indicate it is on back-order.
In the Received tab, the order type reads as Received, Partial Fill, or Back-Ordered.
External orders that are incomplete when they arrive at your institution can be given Partial Fill status. You must review all pending external orders with Partial Fill status. Once reviewed, there are several ways to deal with the order, depending on your institution’s workflow:
To complete external orders set to Partial Fill:
Tip: We recommend searching for the order by date range and location. Note: The order status should read Partial Fill. Important: You must ensure the vendor is aware you still need the missing products and knows you have created the back-order. The order text changes to red to indicate it is on back-order.
Internal orders are given special order status when they request products that aren’t available in axiUm. Before the order can be closed, the new product and code must be added to axiUm, then ordered externally and received. To add the new product and code, staff require the product details from the special order’s Description and Comment fields. When an external vendor’s shipment arrives, you must formally receive the order and review each order item so they are registered in Inventory, before sending the items to the correct internal location. To fill a special order:
Note: You must add a new vendor only if the product ships from a vendor not already within axiUm. The receiver can now deliver the item. In certain situations, it is necessary to close an ordered item. Examples:
The item status changes to Closed. Note: Back-ordered items display in red text.
The text changes to black and the status changes to Closed. After orders have been received at your institution, you may need to alter the order's contents. When necessary, you can edit the number of received units, edit the detail for a received item, adjust a product’s quantity, split an order’s contents if they are divided by expiry dates, and repackage an order’s contents into smaller units. If necessary, you can modify the number of units you received in an order. Example: A mistake was made when entering the number of received units. Important: You can only increase the number of units received. If you need to reduce the number of units received, see Manage Inventory Orders. To edit order items:
The Input field becomes the Quantity field and the Received fields reflect the item’s unit type and description.
Note: If entered, this number can be used later for reporting purposes. If an expiry date is associated with the list item, a Product Expiry window displays. The number updates in the Received field. Across from the lower list item, the Filled and Rec’d column values reflect the value entered. If you entered a product expiry date, it displays in the Expiry column for that item. If necessary, you can modify the details of the received order items. Examples: Item costs and expiry dates.
Example: You want to apply a discount to the product or charge fees for a rush order. Note: This field overrides the regular product price set in the Inventory Product window > Product Details section > Cost per unit field. If changed, this price affects this order only. Notes: Note: This field overrides the reference number set in the Receipt of Goods window > Reference # field. If changed, this affects this order only. You can make an adjustment when something happens to change an item’s status. There are several situations when you must make an adjustment:
Note: You cannot adjust an item until after it has been received. Tip: You can adjust product balances for products marked as inactive if the location still has stock. To adjust an item:
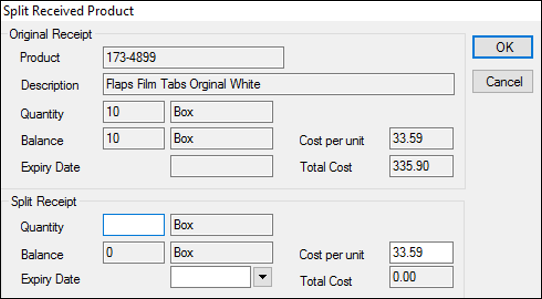
Note: This field may default to your current location. Tip: If known, you can manually enter the code in the Adjustment field. The number displays in the Quantity field. The value entered in the Quantity field displays in the Adjusted field, and in the Product Levels tab, the Quantity column reflects the adjustment. Note: If you reduce an inactive product’s balance at a location to zero through adjustment, a warning displays, prompting you to mark the product location as inactive as well. In some cases, external orders contain products with different expiry dates. When this occurs, you must split the order into smaller groupings to differentiate by expiry date after an order has been received. Example: An external order requests 200 oral rinse bottles. After the order has been received, you see that half the bottles have an expiry date of Nov. 2018 and half have an expiry date of Dec. 2018. You must split the order into two orders, divided by their expiry dates. To split an order:
The values in the Split Receipt pane > Balance and Total Cost fields reflect your change. The order appears twice In the Received tab and in the Quantity column reflects the change in values for each order.
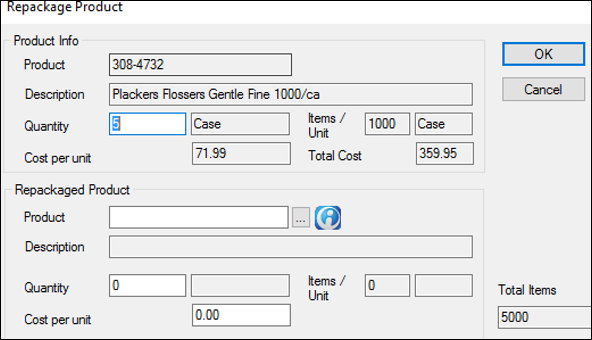
Products are shipped in units which vary depending on product code and quantity. Repackaging orders is the process of separating a larger order into smaller units, giving them another product code and description. After an external order has been received, it is sometimes necessary to repackage the order shipment products into smaller unit sizes for distribution to smaller inventory locations. This is typically done if an order’s contents cannot be used at one location within a reasonable amount of time. Example: Gloves may be shipped by boxes or cases. A box may hold 100 gloves, but a case may hold 10 boxes. If you receive an order for 10 cases of gloves, you might repackage the order as 100 boxes of gloves. This assigns the item a different product code and description because it carries the same product, but holds a different quantity. To repackage an order:
Example: If you want to repackage five cases of floss and you know there are ten boxes in each case, you must select the product code which relates to boxes of floss and input 50 boxes. Note: Read the product descriptions carefully. It is easy to select a product code for the correct product, but the wrong unit. Example: If you are repackaging five cases of floss and you know there are ten boxes in each case, enter 50 in the Quantity field. Under the Received tab, the balance column changes to 0, and under the Product Levels tab, the newly added product’s balance shows a quantity increase.
|