Manage Appointments
|
Once an appointment or appointment request has been created and scheduled, there are many possible stages it can pass through before the appointment is concluded:
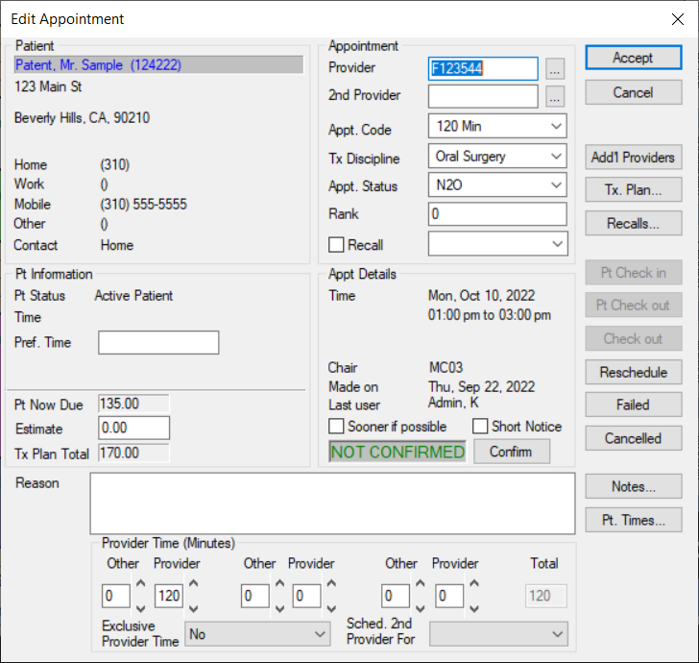
Note: Appointments do not need to pass through all the stages. When working in Book or Chair mode, appointments are typically managed from the Active tab, although pending appointments can be modified, cancelled, scheduled, or deleted from the Pending tab. When working in Availability mode, appointments are typically managed from the Availability tab > Active sub-tab. This includes confirming, cancelling, failing, and re-scheduling appointments. Signing in/checking in, seating patients, and checking out patients can be completed from the Active tab or the Patients module. Depending on your workflow, your institution may want to contact patients prior to appointments to remind them and ensure they can still attend. You can confirm appointments from two places in the Scheduler > Active tab or two places in the Availability tab if working in Availability mode. To confirm an appointment:
The appointment text displays in blue to indicate that the appointment is confirmed. Note: The Confirm button only displays if the Scheduler Options window > Appt Entry Window field is set to Advanced. The text changes from NOT CONFIRMED to CONFIRMED and the appointment text displays in blue in the Scheduler to indicate that the appointment is confirmed. When a patient arrives at your institution, they must be signed/checked in. This allows you to track who is in the clinic being treated and which patients failed to arrive. Tip: A blue Patient Arrival indicator displays on the status bar when patients arrive and sign in for appointments. It is designed to ensure a provider acknowledges checked in patients or checks in signed in patients when they arrive for appointments. Depending on your institution’s setup, axiUm may be configured to check in patients automatically when they’re signed in or the two processes may be kept separate. Examples: Some institutions use kiosks or front desk staff to sign in patients at reception and check in patients for their appointment at the clinic. Other institutions may check in patients automatically at sign in. Tip: Front desk staff can also sign in and check in patients from the Patients module using the Patient Sign In and Patient Check In right-click options. Once checked in from either module, the patient’s name displays in red text in the Patients module. To sign in/check in a patient for an appointment:
Note: The Patient Sign In option is only enabled if the Station Options window > Patients > SignInSlip > ShowSignIn entry is set to 1 and the patient has an active appointment scheduled for today and is not yet signed in. The patient’s name displays in purple text to indicate they are signed in and a blue Patient Arrival indicator displays on the provider’s status bar:
Tip: You can click the Patient Arrival indicator to display the Patient Arrivals window and review all current patient arrivals. The patient’s name displays in red text to indicate they are checked in to a clinic. Note: Any appointments scheduled within a specified time frame can also be checked in. This is managed from the Scheduler Options window > Check In if Multiple Appts and Check In Appts for __ (minutes ahead) fields. Tip: If a patient is checked in by mistake, you can right-click the appointment and select Undo Patient Check In. For patients with multiple checked in appointments, an Undo Patient Check Ins window displays, allowing you to review and select as necessary. In many cases, an appointment may not start right away, even once the patient has been checked in. Example: A patient may sit in a waiting room until the provider or another staff member comes to take them to their chair. You can indicate during an appointment that a patient has been seated. This can signal to the provider that their patient is ready for them or can be used for reporting purposes to track efficiencies in a clinic. To seat a patient for an appointment:
Note: This option is only enabled if the patient has been checked in. The appointment text displays in black text to indicate the patient is seated in the clinic. Tip: If seated by mistake, right-click the appointment and select Undo Patient Seated. Once an appointment has been completed, you can manually check out a patient to indicate that the appointment is complete. Tip: If necessary, you can check out the patient from only the Scheduler. Checking a patient out from only the Scheduler and leaving them checked in to axiUm is referred to as checking out the appointment. Notes:
You can check out patients from two places in the Scheduler > Active tab. To check out a patient/appointment:
The patient is checked out of the Patients module and their name displays in the Scheduler in gray text to indicate they are checked out of their appointment. If you clicked Pt Check out, the patient is checked out of the Patients module and their name displays in the Scheduler in gray text to indicate they are checked out of their appointment. If you clicked Check out, the patient’s name displays in the Scheduler in gray text to indicate their appointment has been checked out but remains displayed in red in the Patients module to indicate they are still checked in to axiUm. Note: These buttons only display if the Scheduler Options window > Appt Entry Window field is set to Advanced. Tip: If checked out by mistake, right-click the appointment and select Undo Patient Check Out. At most institutions, appointment changes follow a typical, linear workflow. Example: An appointment is created and scheduled, then confirmed closer to the date. On the date, the patient arrives and is signed in/checked in, then seated at the chair and checked out at the end of the appointment. Sometimes changes must be made to appointments that are outside the basic flow of an appointment. This can include editing appointment details as well as rescheduling, cancelling, or failing appointments.
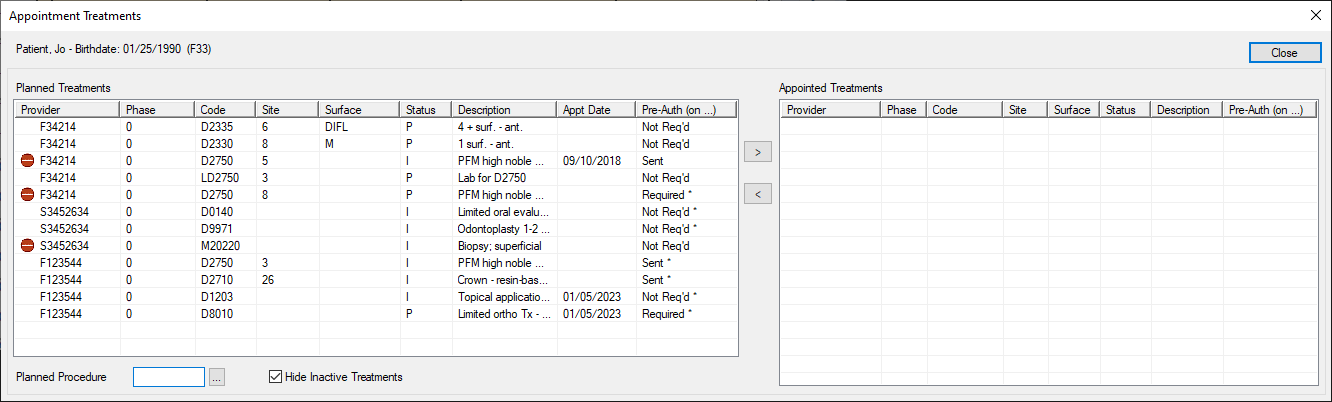
Note: This button only displays if the Scheduler Options window > Appt Entry Window field is set to Advanced. The appointment text also displays in blue in the Scheduler to indicate that the appointment is confirmed. If a primary provider has additional assistants/providers attending the appointment, you can assign them to the appointment. This prevents them from being booked into appointments at the same time but does not book them into a chair. Tip: This is useful in clinics when there is one treating provider and multiple observing providers. Tip: To remove a provider, select a listed provider and click the < button. In the Scheduler > Active tab, the additional providers/assistants have horizontal lines display down the left side of the appointment block and they are indicated in the appointment with a + icon. Planned treatments for the patient display in the left pane and appointed treatments that have been assigned to an appointment display in the right pane. Note: Only approved planned treatments display. Tip: If you want to display all planned treatments, deselect the Hide Inactive Treatments checkbox.
Note: This button only displays if the Scheduler Options window > Appt Entry Window field is set to Advanced. It is only enabled if the appointment is active or signed in and scheduled for today. The patient’s name displays in red text to indicate they are checked in to a clinic. Note: This button only displays if the Scheduler Options window > Appt Entry Window field is set to Advanced. The patient is checked out of the Patients module and their name displays in the Scheduler in gray text to indicate they are checked out of their appointment. Note: This button only displays if the Scheduler Options window > Appt Entry Window field is set to Advanced. It is only enabled if the appointment is checked in. Important: Just as you can select patients for use only in the Scheduler, you can also check out patients only in the Scheduler. This is referred to as checking out the appointment. If you check out an appointment, the patient remains checked in in the Patients module. The patient’s name displays in the Scheduler in gray text to indicate their appointment has been checked out, but they remain displayed in red in the Patients module to indicate they are still checked in. Note: This button only displays if the Scheduler Options window > Appt Entry Window field is set to Advanced. It is only enabled if the appointment is active or signed in. Note: This button only displays if the Scheduler Options window > Appt Entry Window field is set to Advanced. It is enabled if the appointment is active, signed in, checked in, or checked out. Note: This button only displays if the Scheduler Options window > Appt Entry Window field is set to Advanced. It is enabled if the appointment is active, signed in, checked in, or checked out.
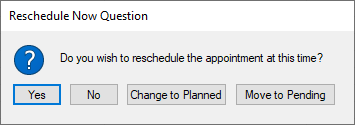
Sometimes appointments need to be rescheduled. This can include cancelled and failed appointments. When necessary, you can reschedule appointments from three places in the Scheduler > Active tab. To reschedule an appointment:
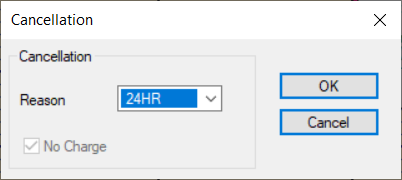
Tip: You can display failed or canceled appointments on the Active tab to locate them more easily. This is managed from the Scheduler Options window > Show Appointments field. Note: The right-click option and window are managed from the Scheduler Options window > Patient/Family Appointments Window section > Mode field. Important: Yellow floating appointments remain indefinitely until dealt with appropriately. You must either finish rescheduling the appointment or perform another action such as cancelling, deleting, or changing to planned or pending. An appointment can be cancelled when the patient or provider does not want to or cannot attend at this time. When necessary, you can cancel appointments from several places in the Scheduler. Note: Cancelled appointments work in conjunction with the Clinics window > Charge for Cancelled Appt. field. To cancel an appointment:
Note: The Cancelled button only displays if the Scheduler Options window > Appt Entry Window field is set to Advanced. It is enabled if the appointment is active, signed in, checked in, or checked out.
Note: Cancelled appointments can still be rescheduled at a later date.
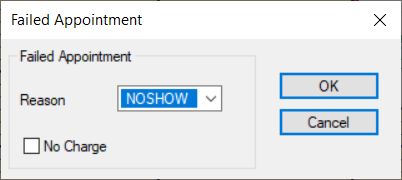
An appointment can be failed when the patient does not arrive for the appointment and did not provide cancellation notice prior to the appointment time. When necessary, you can fail appointments from two places in the Scheduler. Note: Failed appointments work in conjunction with the Clinics window > Charge for Failed Appt. field. To fail an appointment:
Note: The Failed button only displays if the Scheduler Options window > Appt Entry Window field is set to Advanced. It is enabled if the appointment is active, signed in, checked in, or checked out.
Note: Failed appointments can still be rescheduled at a later date.
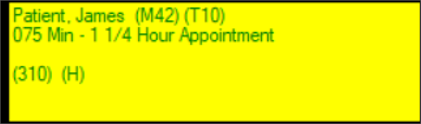
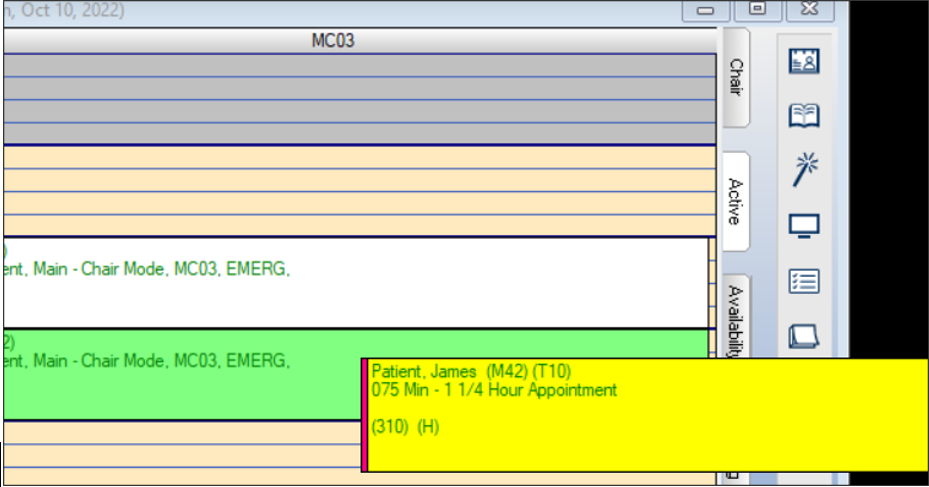
Note: Floating appointments are not applicable when working in Availability mode. As part of the direct booking and rescheduling processes, appointments can display as yellow floating appointments. Once displayed, you must manage the appointment appropriately. Depending on the situation, you must schedule the yellow floating appointment or perform another action such as cancel, delete, or change to planned or pending status. Tip: Because yellow floating appointments display indefinitely until they are dealt with, you can manage a floating appointment from any tab in Scheduler. To manage a floating appointment:
Example: Open the Scheduler module and click the Lists (
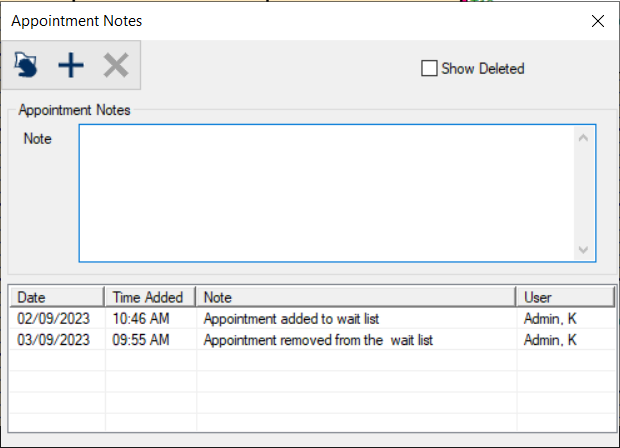
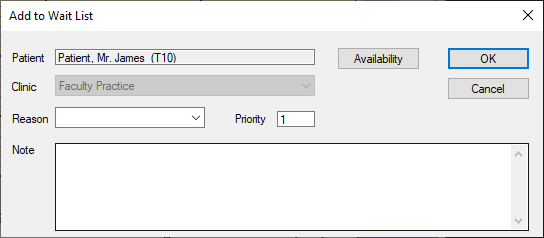
In rare cases, you may need to delete an appointment. Important: There are many other ways to modify inaccurate appointments. Whenever possible, we recommend you edit or cancel the appointment as necessary. The planned appointment can now be searched for and scheduled from the Appointment Lists window. The pending appointment can now be searched for and scheduled from the Pending tab. Note: This option is only available if the yellow floating appointment was created from an appointment request using the New Appointment Request window. The appointment can now be searched for and scheduled from the Availability tab > Request sub-tab. When necessary, you can place appointments for patients that want an earlier date on the wait list.
Example: Click the Active tab and review the listed appointments.
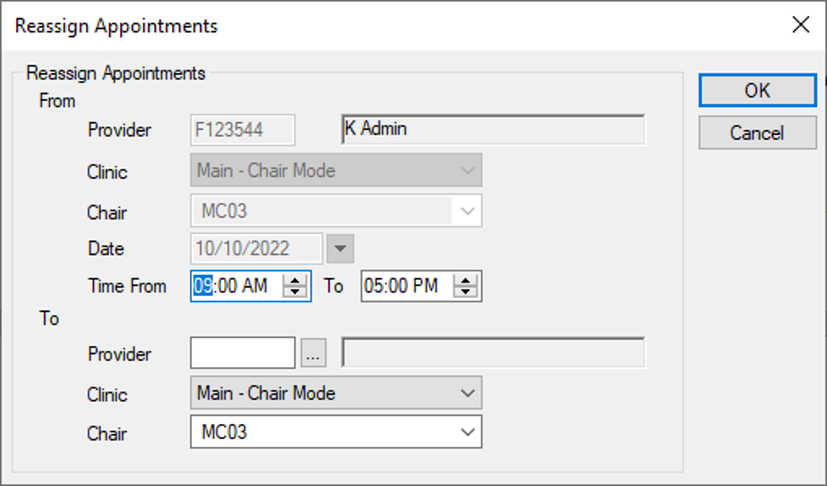
Note: When working in Availability mode, this task is not applicable. When necessary, you can reassign a provider’s appointments to another provider. Examples:
To reassign an appointment:
Note: The right-click option is only enabled if the chair has appointments scheduled for the selected date.
|