Fill Internal Orders
|
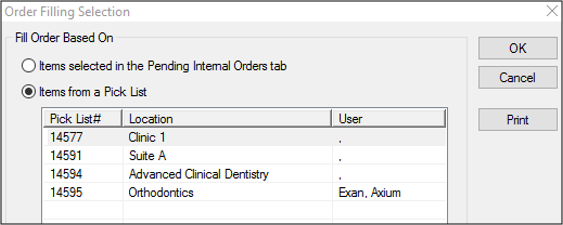
If your institution uses pick lists to fill internal orders, you must locate the correct order and print the pick list before you fill the order. Note: Not all institutions require a printed pick list. Only print the pick list if your institution follows a conventional, shopping list setup that requires you to gather all items before filling the order. After an internal order has been made and the pick list has been printed (if necessary), you can fill the order and update the Inventory module. Note: The requested from location is usually, but not all always, a main warehouse location. The process to fill internal orders will vary depending on the institution’s setup:
As part of the filling process, you must physically retrieve the internal order contents and make them ready to deliver them to the location that ordered them. To fill an internal order:
Tip: To select multiple items, press Ctrl. Note: The item(s) you select is only relevant if you will fill the order without using a pick list. The pick list prints and the order’s status changes to Picked.
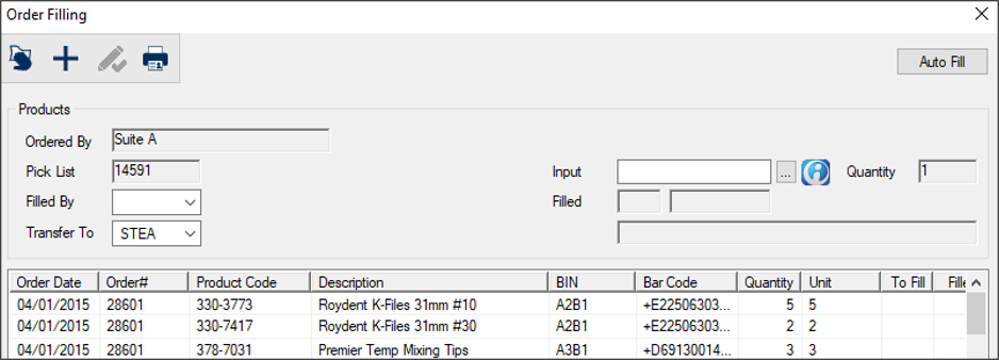
Note: This opens the order products(s) you selected before you clicked Fill.... The Order Filling window displays with the item(s) listed.
Tip: Each item listed in the order may display a BIN to indicate where the item is stored. You can click the BIN column header to sort the products by BIN and (if applicable) match how pick lists are organized. Next to each item, the Filled column displays the value entered in the Quantity column. Note: Only use this method if all ordered products are present. Across from the list item, the To Fill column changes to 0 and the Filled column reflects the quantity filled. Note: If only a partial order can be filled, enter the amount you have available. Example: If the location ordered 50 boxes of gloves, but are only 25 are available, enter 25. The item text changes to red to indicate it is on back-order. In the Closed Orders tab, the order’s status changes to Filled. Note: If the order was partially filled, it remains under the Pending Internal Orders tab and the status reads Back-ordered. In the Product Levels tab, the Quantity number reduces for that item, showing the new remaining number for the main warehouse. The receiver can now deliver the item(s). |