Add EOBs

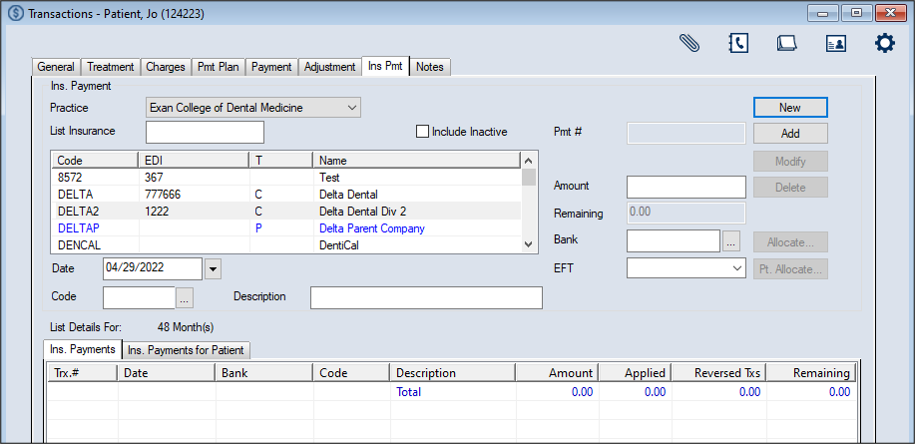
If necessary, you can manually add an EOB to the correct treatment in a claim from the Transactions module > Insurance Payment tab.

To add an EOB:

  1. Open the Transactions module and click the Insurance Payment tab > Ins. Payments (All) sub-tab.
  2. Search for and select the insurance company.
  3. Note: The full list displays if the Load all Ins. companies in list checkbox is selected in the Transaction Options window > Payment Options section.

    1. Enter the first character(s) of the company you are searching for based on the column headings and click the applicable heading to sort.
    2. Tip: You can enter an underscore (_) to display all results within the column.

      Note: You can select the Include Inactive checkbox to include inactive insurance companies in the search.

    3. Select a listed insurance company.
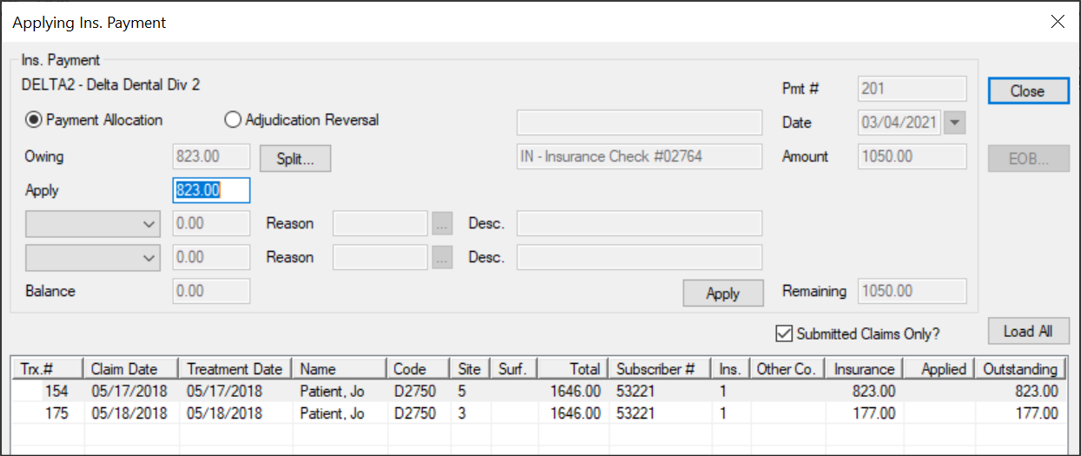
  4. Select a listed payment and click Allocate… to display the Applying Ins. Payment window.
  5. Note: The available fields display differently depending on which button is used to open the window.

  6. Select the appropriate treatment line and click EOB… to display the Explanation of Benefits (EOB) Details window.
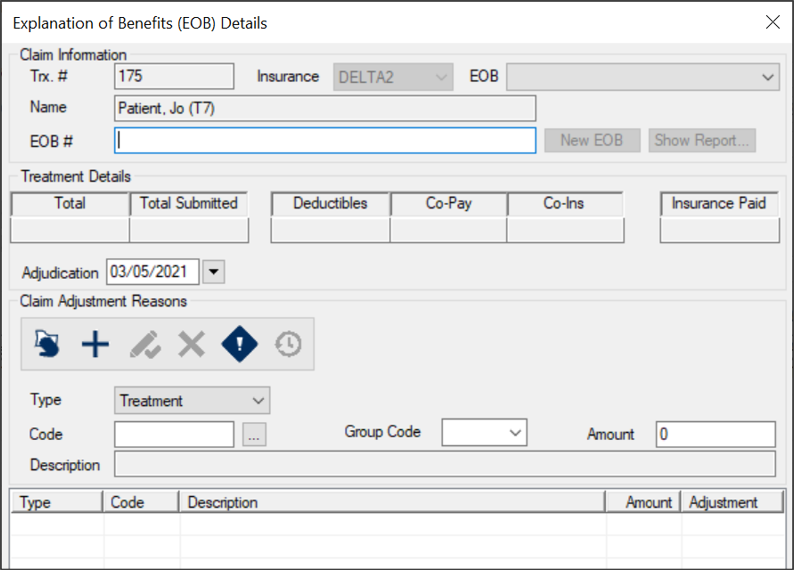
  7. Click New EOB.
  8. Complete the Claim Information fields as necessary.
  9. Field Description
    Trx. #

    This read-only field displays the axiUm-generated claim number that was assigned when you created this claim.

    Insurance

    This read-only field indicates the name of the insurance company associated to this patient.

    EOB

    This field allows you to select a listed date record to view the EOB details.

    When adding a new record, ignore this field.

    Name This read-only field displays the name of the patient associated to this EOB.
    EOB #

    Enter the reference number for tracking this EOB.

  10. Review the Treatment Details section.
  11. If necessary, select another Adjudication date from the calendar drop-down.
  12. If necessary, add a claim adjustment reason:
    1. Click the Clear Data () icon.
    2. Complete the fields as necessary and click the Add a new Record () icon.
    3. Field Description
      Type

      Select a type from the drop-down:

      • Claim: Indicates this adjustment reason record applies to the entire claim.
      • Treatment: Indicates this adjustment reason record applies only to the selected treatment.
      Code

      Enter the claim adjustment reason code or click the ellipsis to select from the Claim Adjustment Reason Codes window.

      Description

      This read-only field displays the description associated with the selected claim adjustment reason code.

      Group Code Select a code from the drop-down.
      Amount

      Enter the adjustment value.

  13. If necessary, add a remittance advice remark:
    1. Select a listed claim adjustment reason and click the Claim Remittance Advice Remarks () icon to display the Claim Remittance Advice Remarks window.
    2. Enter the claim remittance advice remarks code or click the ellipsis to select from the Claim Remittance Remarks Codes window.