|
Once you have processed the remittance responses, you can print the results and indicate any issues that may require your attention.
- Search for and locate the response.
- Next to each response you want included, select the checkbox.
Tip: Click Select all to quickly select all payments.
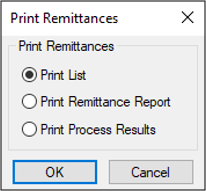
- Click Print to display the Print Remittances window.
- Select the Print Process Results radio button and click OK to display the Remittance Processing Results Options window.
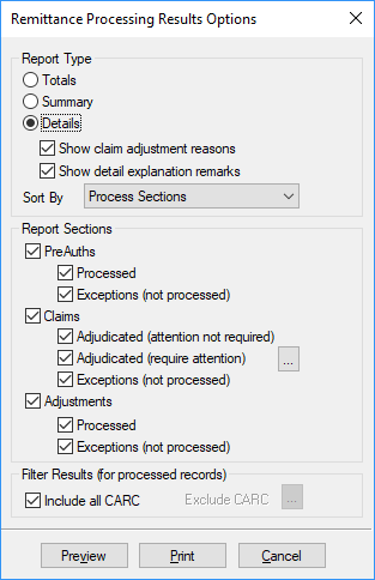
- Under Report Type, select the applicable radio button:
- Totals: Lists the total for each included section.
- Summary: Lists a summary for each included section.
- Details: Lists all details for each included section.
Note: The Show claim adjustment reasons and Show detail explanation remarks checkboxes are only enabled if you select Details.
- Show claim adjustment reasons: Displays the adjustment reasons in the report.
- Show detail explanation remarks: Displays the explanation remarks in the report.
- Sort By: From the drop-down list, select how you would like to sort the results:
- Process Section
- Claim Status
- Under Report Sections, select the checkbox for each section you want included in the report:
- PreAuths
- Claims
- Adjustments
- Under Filter Results (for processed records), complete one of the following:
- Click Print.
The Crystal Report prints with the applicable information.
|