Work with the Availability Tab
|
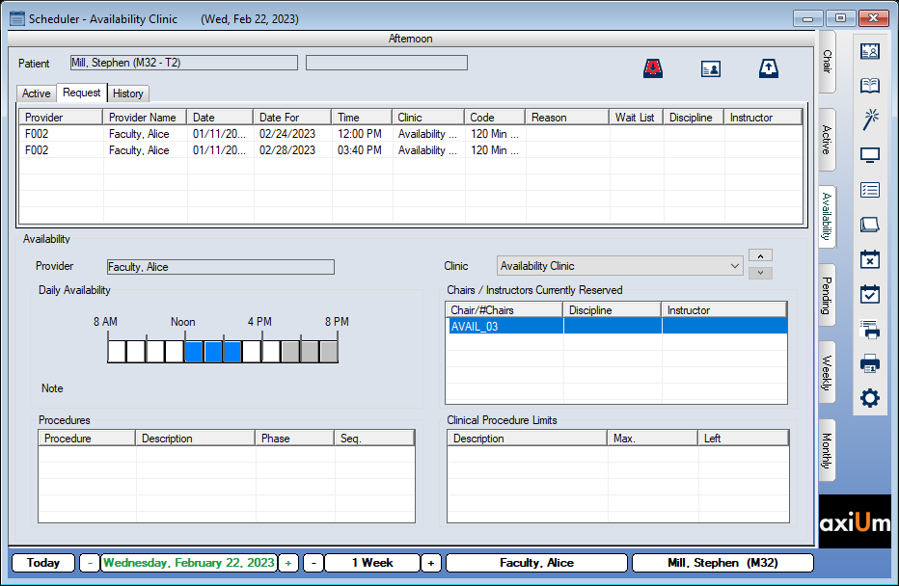
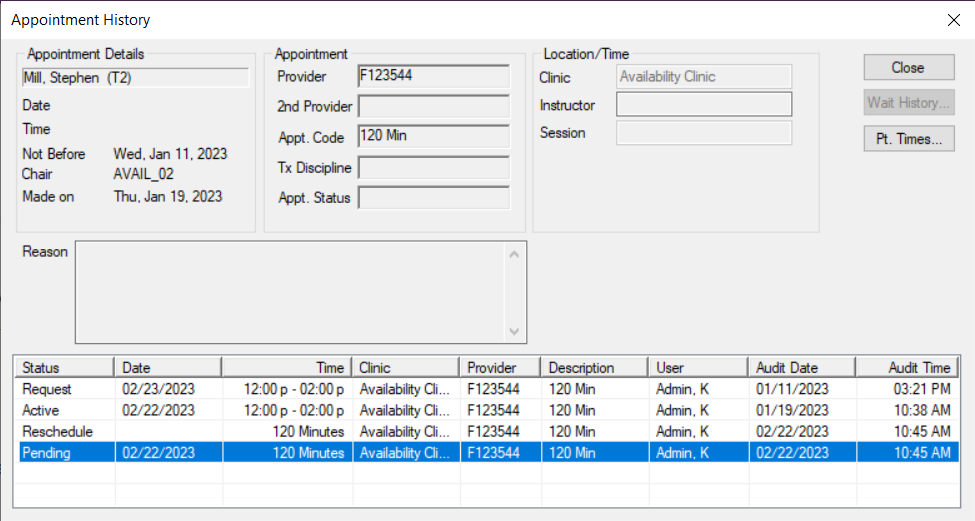
The Availability tab allows group managers and scheduling clerks to work with appointments and appointment requests without having to use the Active and Chair tabs. Important: This tab is only applicable for staff that work in Availability mode to schedule appointments. Note: Depending on your role and the workflow used at your institution, you may still choose to work minimally in those tabs. The Availability tab has three sub-tabs that display any active appointments, appointment requests, and the historic record of all appointment activities for the selected patient. It also allows you to access and review appointment requests made by providers, then schedule the appointments into available time slots based on the request parameters. Tip: The Scheduler opens the Availability tab by default if the Scheduler Options window > Scheduler Type section > Availability radio button is selected. Information in a student provider’s appointment request includes the patient name, chair, and type, time, and length of appointment. Depending on your role permissions, you may review and schedule appointment requests for other providers or may be limited to scheduling your own. Note: Users that are configured as managers for group(s) of students can review and schedule for other providers. Users that are configured as non-managers can schedule their own requests and can see other requests but cannot schedule other provider’s requests. You can also perform a variety of other tasks related to appointments from the Availability tab. The Daily Availability area indicates the selected provider’s availability for the selected day. The time blocks may display in different colors:
Note: If using Availability mode correctly, this color should not display. To work with the Availability tab:
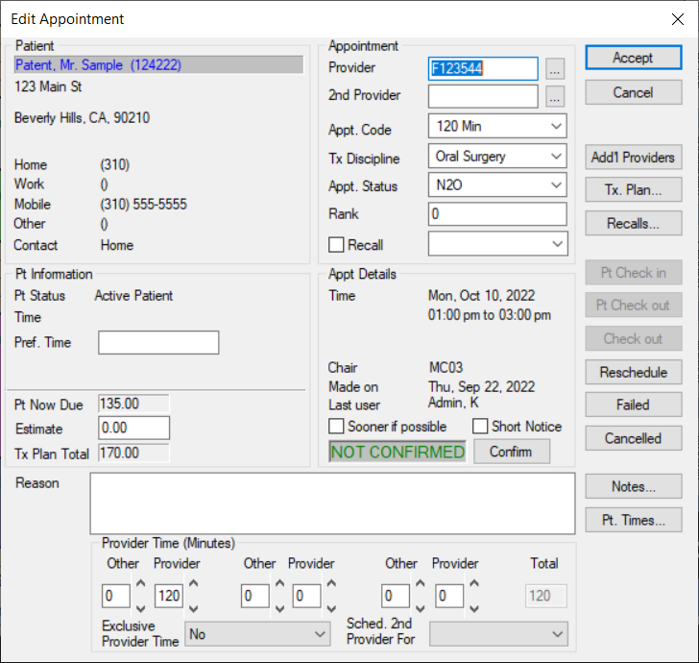
The appointment text displays in blue to indicate that the appointment is confirmed.
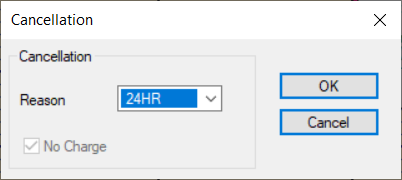
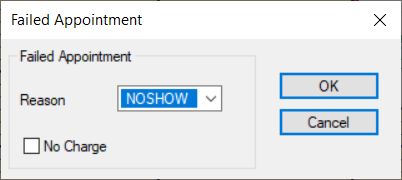
An appointment can be failed when the patient does not arrive for the appointment and did not provide cancellation notice.
|
 ): This indicates the chair is not reserved by anyone.
 ): This indicates the chair is reserved without an appointment made yet.
 ): This indicates that the chair is reserved for another person with a student-entered appointment.
 ): This indicates that the chair is reserved for another person with a staff-entered appointment.
 ): This indicates that the chair is reserved for the student currently logged in.
 ): This indicates that this is an unavailable time slot.
 ): This indicates that the time is scheduled off for a holiday.