|
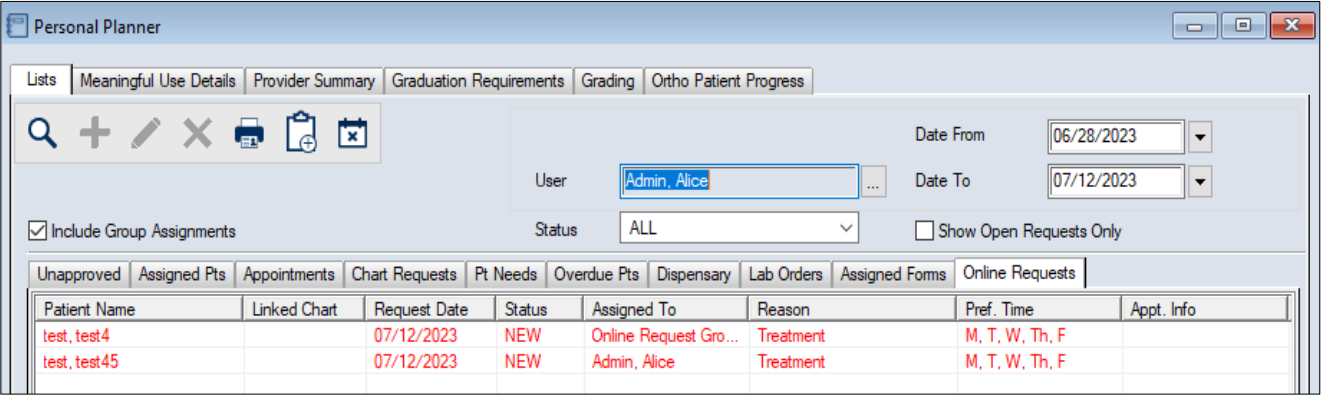
Online appointment requests are completed and submitted through the appointment request page by prospective patients. Once a request has been submitted, it displays in the Personal Planner module > Online Requests tab. From here, you can search for requests, review requests, and manage requests as needed.
 Search for Requests Search for Requests
You can easily search for new, in-process, or closed requests.
- Open the Personal Planner module and click the Online Requests tab.
-
In the upper pane, modify the search criteria as necessary and click the Search for Data ( ) icon. ) icon.
| User
|
If applicable, click the ellipsis to display the Users List window and select a user to search for.
Note: This field defaults to the logged in user.
|
| Date From / Date
To
|
Select your search’s start and end dates from the drop-down calendar.
These fields identify the date range of requests to include in the search. By default, Date To is set to the current date, and Date From is two weeks earlier.
Note: These default values cannot be configured.
|
| Include Group
Assignments
|
Select the checkbox to include requests that are assigned to a messenger group (that the selected user is part of) as well as requests assigned to the user in the search.
Note: This checkbox is selected by default.
|
| Status
|
Select a request status to search on from the drop-down list
to filter results for a specific status.
Note: This field is set to ALL by default.
|
| Show Open
Requests Only
|
Select the checkbox to include only requests that are open
in the search results. When selected, any request set to a
status that indicates the request is closed is excluded from
the search results.
Note: This checkbox is selected by default.
|
Review Requests
Once you have located a request, you can review the request information to determine how best to proceed with and process the request.
- Open the Personal Planner module and click the Online Requests tab.
-
Search for online requests and review the listed results.
-
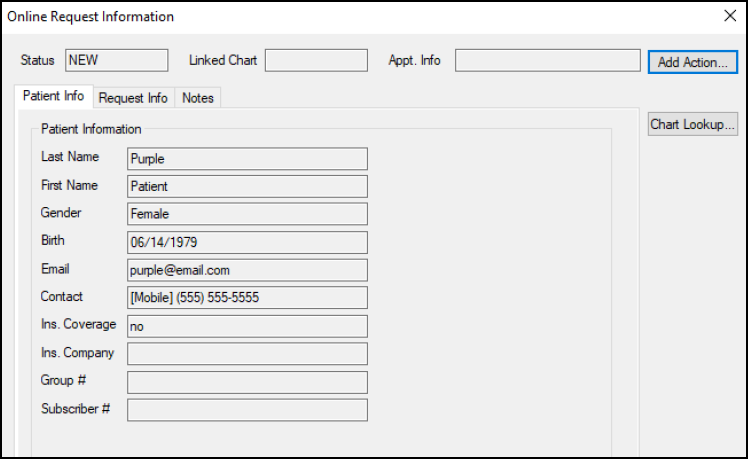
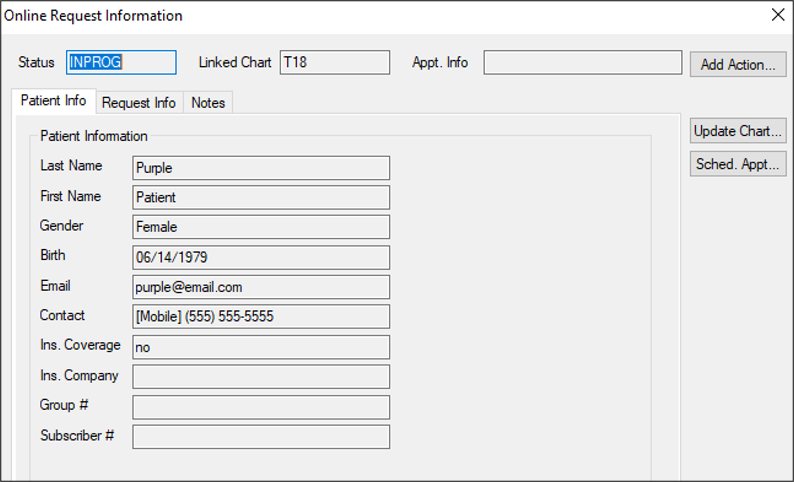
Right-click a request and select View Request… to display the Online Request Information window.
Tip: You can also double-click the request to display the window.
-
Click the Patient Info tab to review the submitted patient information.
-
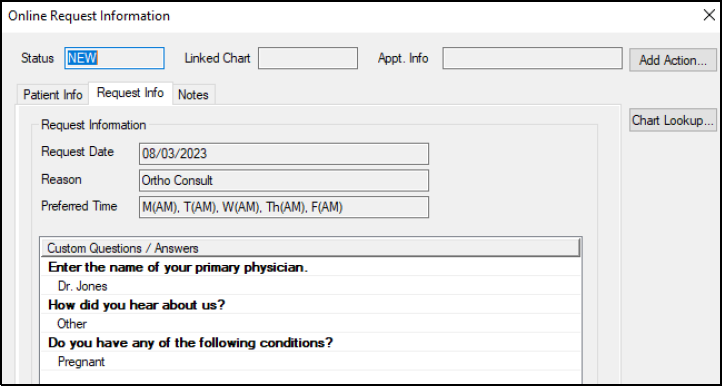
Click the Request Info tab to review the submitted request information such as the reason for the request and any custom questions from the online request form.
- (Optional) If this is not a new request, click the Notes tab to review any previously entered notes.
Manage Requests
- Open the Personal Planner module and click the Online Requests tab.
-
Search for online requests and review the listed results.
- To perform another task, complete any of the following:
Select Patient
-
Right-click a request and choose Select Patient.
-
When prompted, click Yes to continue.
Note: This option is only available for requests that are linked to a patient record.
Assign Requests to Yourself
-
Right-click a request and select Assign To Me.
Important: This request will no longer be visible to others in the online requests messenger group. Users with access to modify the User field can still access the request.
Link Request to Patient Record
-
Right-click a request and select View Request… to display the Online Request Information window.
Tip: You can also double-click a request to display the window.
- Search for the patient record.
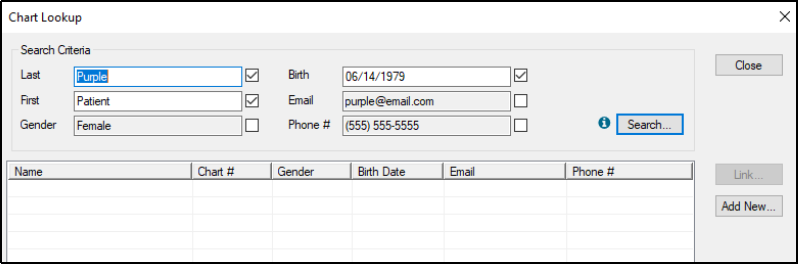
- Click Chart Lookup… to display the Chart Lookup window.
-
Under Search Criteria, select/deselect each checkbox as necessary to include/exclude the field and click Search.
Tip: If necessary, you can modify the content in the First and Last fields.
Notes:
-
These fields default based on configuration.
-
The Phone # field searches on all phone types (work/mobile/home).
- If the patient record is not listed, create a new patient record and add the request.
-
Click Add New… to display the Patient Info – Add window.
Note: The information from the online request is auto-populated in the applicable fields.
-
Review the fields to confirm the information is correct and click Save.
The patient record is saved, and the Guarantor, Employer and Insurance tabs display.
-
If the patient record is listed, add the request to the existing patient record.
-
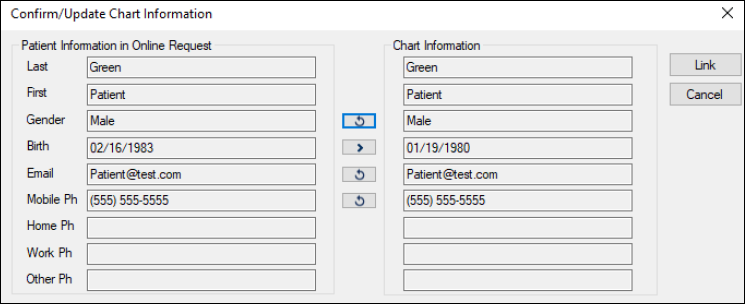
Select the correct listed patient record and click Link… to display the Confirm/Update Chart Information window.
-
Review and compare the request information with the information on the existing patient record.
Tip: Any differences display a  button. button.
-
If applicable, next to each line, click the button to update the axiUm patient record with the request information.
Tip: To undo an action, click the  button. button.
Important: If a patient record is updated with request information and saved, it cannot be undone from the Confirm/Update Chart Information window.
-
Click Save to add the request, make any applicable patient information changes, and close the window.
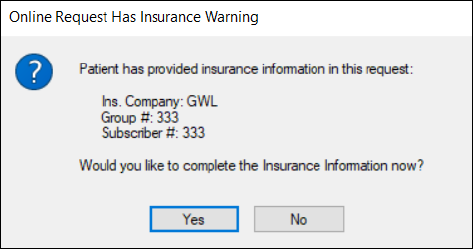
If insurance information was included in the online request, a message displays prompting you to enter the insurance information.
-
If prompted, enter the patient’s insurance information.
-
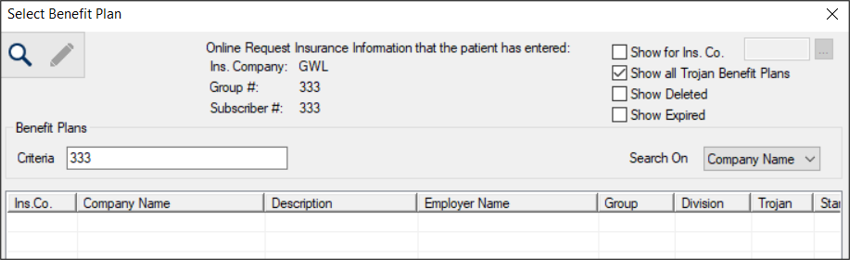
Click Yes to display the Patient Info window with the Insurance tab selected and the Select Benefit Plan window.
Note: If you choose not to enter insurance information at this time, you can add it manually later.
-
Locate the correct benefit plan and double-click the record to add to the patient.
Note: If a matching benefit plan is not found, you can close this window and enter a new benefit plan according to your usual process or call the patient to confirm their insurance information.
-
When prompted, click Yes to confirm.
Once the online request is associated with a patient record, the following occurs:
-
The Linked Chart field displays the patient chart number.
-
An Update Chart… button displays instead of the Chart Lookup… button. When clicked, the Confirm/Update Chart Information window displays and allows you to compare the information between the request and the patient record.
- A Sched. Appt… button displays. When clicked, the Patient Appointments window or Family Appointments window displays and allows you to schedule an appointment for the patient.
Manage Request Actions and Assignments
When online requests are submitted by patients, they are given a default status and are assigned to a user or messenger group in the Personal Planner module. Depending on the reason for treatment selected, the request may need to be assigned manually to a different user or messenger group.
The status of the request is updated automatically when certain activities are performed. This includes the following:
-
When the request is linked to a new patient record
-
When the request is linked to an existing patient record
-
When an appointment is scheduled for the patient.
Tip: You can configure axiUm to send emails to patients automatically when a status changes.
When necessary, you can manually modify online requests using request actions and assignments. This can include updating the status of a request, reassigning the request to another user or messenger group, or adding a note to the request.
To manage request actions and assignments:
-
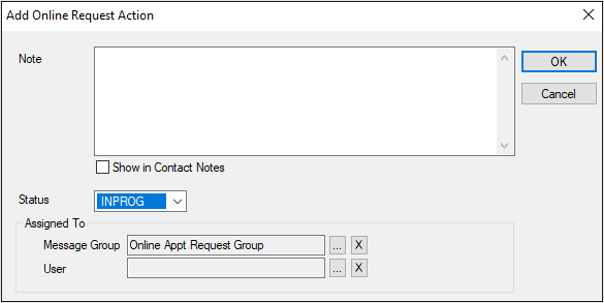
Right-click a request and select Add Action… to display the Add Online Request Action window.
Tip: You can also access the window from the Online Request Information window > Add Action… button.
-
Complete the fields as necessary and click OK.
| Note
|
Enter any applicable note text.
|
| Show in Contact Notes
|
Select the checkbox to include the note in the patient’s contact notes.
Note: This checkbox is only applicable if text is entered in the Note field.
|
| Status
|
To change the status of the request, select a new status from the drop-down list.
|
| Messenger Group / User
|
To reassign the request, click the ellipsis next to one of the fields to display the Message Groups or Users List window and select another group or user to reassign the request.
Important: If a user and message group are both specified, the requests will be assigned to the user only. We recommend you specify either a user or group to avoid confusion.
Tip: As a quick way to assign the request to yourself, you can right-click the request in the Personal Planner and select Assign To Me.
|
Manage Request Notes
When necessary, notes can be added to a request. You can add notes from two places:
To manage request notes:
- Right-click a request and select View Request… to display the Online Request Information window.
Tip: You can also double-click a request to display this window.
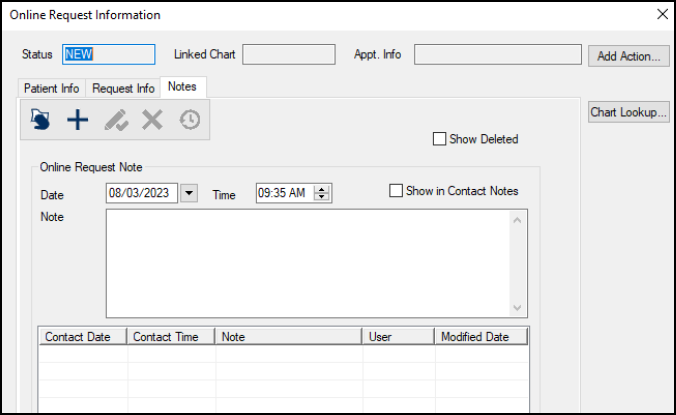
- Click the Notes tab and review any notes associated with the online request.
Tip: If necessary, you can select the Show Deleted checkbox to display deleted notes in the list.
-
To perform another task, complete any of the following:
Add Notes
- Click the Clear Data (
 ) icon. ) icon.
- Complete the fields as necessary and click the Add a new Record (
 ) icon. ) icon.
| Date / Time
|
These read-only fields identify the date and time that the note was last modified.
|
| Show in Contact Notes
|
Select the checkbox to include the note in the patient’s contact notes.
Note: If the request has not been added to a patient record, any notes with this selected will be added to the contact notes when the request is added to a patient chart.
Tip: If a note also displays in contact notes, any changes are reflected in both places regardless of where the change was made.
|
| Note
|
Enter the contents of the note.
Note: This field can store a maximum of 4000 characters.
|
Edit Notes
- Select a listed entry.
- Make any necessary changes and click the Modify Record (
 ) icon. ) icon.
Delete Notes
- Select a listed entry and click the Delete Record (
 ) icon. ) icon.
- When prompted, click Yes to confirm the deletion.
View Note History
- Select a listed entry and click the Show History (
 ) icon to display the Online Request Notes History window. ) icon to display the Online Request Notes History window.
- Review the listed entries.
Tip: Select an entry to display the specific information in the fields.
Schedule Appointments from the Request
When ready, you can schedule an appointment for the patient that will be associated with the online request.
Depending on your configuration, this will open the Patient Appointments window or Family Appointments window. From there, you can schedule the appointment according to your usual scheduling process.
Note: If a patient has an online request without an associated appointment, any user that attempts to schedule an appointment for the patient will be prompted to assign the appointment to the request.
To schedule an appointment from the request:
- Right-click a request and select View Request… to display the Online Request Information window.
Tip: You can also double-click a request to display this window.
- Click Sched Appt...to display the Patient Appointments window or Family Appointments window.
- Schedule the appointment according to your usual scheduling process.
Unlink Patient Appointment
-
Right-click a request and select Unlink Patient Appointment.
-
When prompted, click Yes to continue.
Note: This option is only available if the request is associated with a patient record and an appointment.
Important: This only removes the link with the request and does not unscheduled the appointment.
Unlink Patient Chart
-
Right-click a request and select Unlink Patient Chart.
-
When prompted, click Yes to continue.
Note: This option is only available for requests that are linked to a patient record.
Important: This removes the link between the online request and the patient and will remove any contact notes added via the online request. If applicable, the appointment will be unlinked from the request as well.
View Request Event History
-
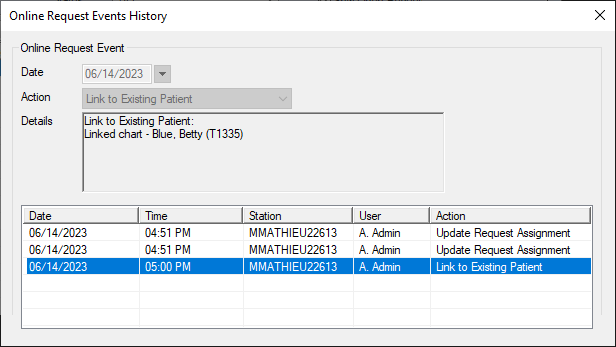
Right-click a request and select View Events History… to display the Online Request Events History window.
-
Review the listed entries.
Tip: Select an entry to display the specific event details in the fields.
|