Grant Authorized Representatives Access to Accounts
In some cases, you may allow a patient’s authorized representative to use PatientAccess either in addition to the patient or on their behalf. This allows the representative to perform any of the following:
- View and confirm appointments.
- Update personal information, including contact and address details.
- View medical information, including problems, alerts, allergies, and medications.
- Change their user name, password, and security questions.
- View contact information and frequently asked questions.
Some institutions offer PatientAccess self-registration to authorized representatives. If your institution allows representatives to use PatientAccess self-registration, they can create their password without assistance.
If your institution does not offer self-registration, or representatives prefer to have their credentials assigned to them, you can still create the credentials manually.
To grant an authorize representative access to an account:
- Open the Patients module and select a patient.
- Open the Patient Info window and click the Personal tab.
- Click PatientAccess Info... to display the PatientAccess Info. window.
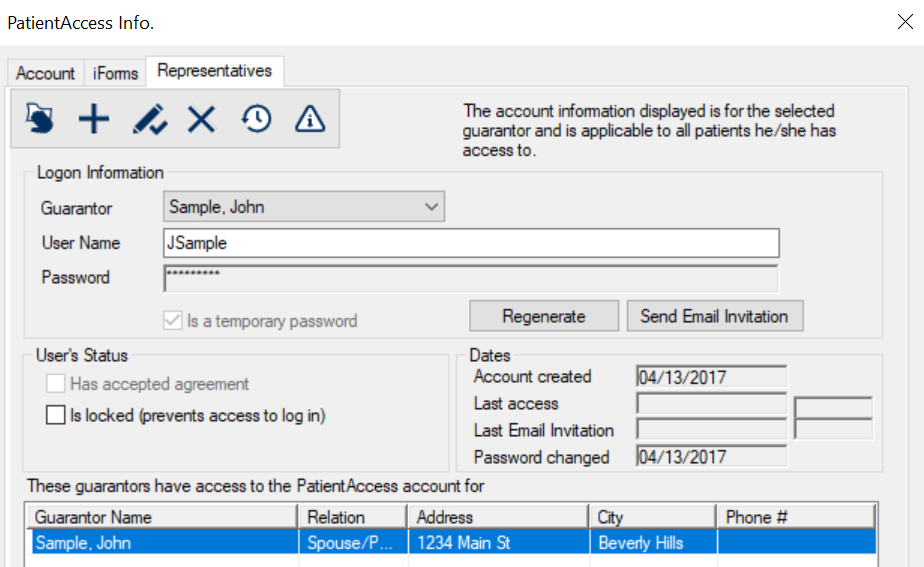
- Click the Representatives tab.
- From the Guarantor drop-down list, select the guarantor you want to grant access.
- Click the Add a new Record (
 ) icon to add the guarantor to the list of guarantors with access.
 - If prompted to confirm you want to grant access, click Yes.
- Complete any of the following:
- Click Send Email Invitation to send the representative an email allowing them to complete the registration process.
- Click Regenerate to generate a password to provide to the representative.
- Click the Modify Record (
 ) icon.
Note: If the guarantor you must select is not available, you may need to add them to the patient record.