Manage Online Request Actions and Assignments

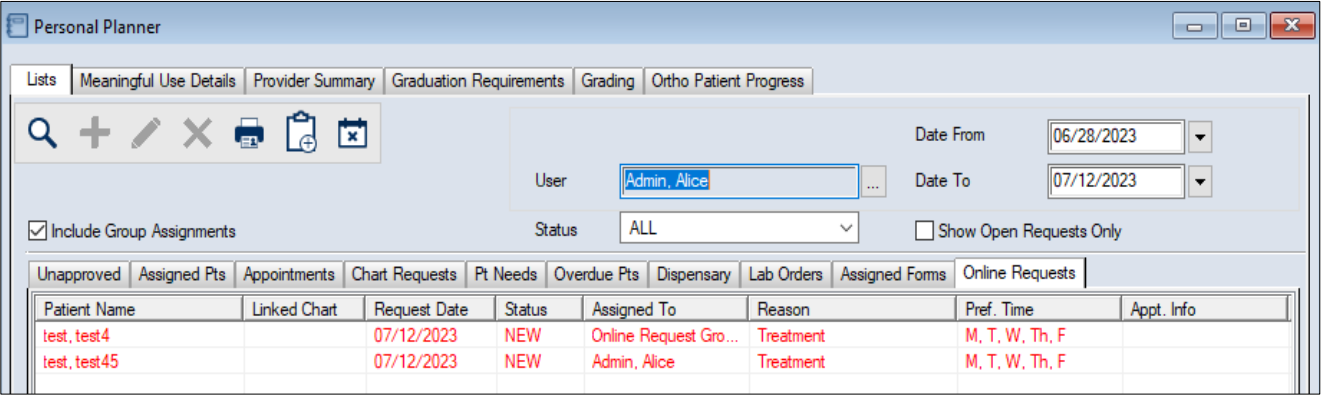
You can manage actions and assignments for online appointment requests from the Personal Planner > Lists tab > Online Requests sub-tab.

When online requests are submitted by patients, they are given a default status and are assigned to a user or messenger group in the Personal Planner module. Depending on the reason for treatment selected, the request may need to be assigned manually to a different user or messenger group.

The status of the request is updated automatically when certain activities are performed. This includes the following:

  • When the request is linked to a new patient record.

  • When the request is linked to an existing patient record.

  • When an appointment is scheduled for the patient.

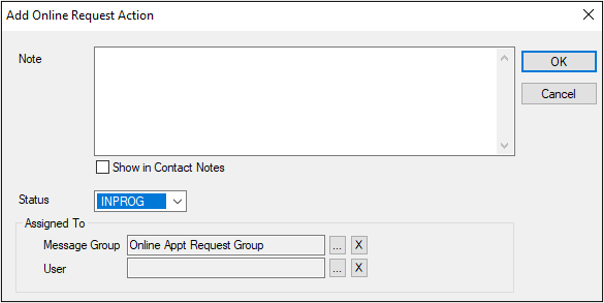
Tip: You can configure axiUm to send emails to patients automatically when a status changes.

When necessary, you can manually modify online requests using request actions and assignments. This can include updating the status of a request, reassigning the request to another user or messenger group, or adding a note to the request.

To manage actions and assignments:

  1. Open the Personal Planner module to the Lists tab and click the Online Requests sub-tab.
  2. Modify the search criteria as necessary and click the Search for Data () icon to display your list of online requests.

  3. Right-click a listed entry and select Add Action… to display the Add Online Request Action window.
  4. Tip: You can also access the window from the Online Request Information window > Add Action… button.

  5. Complete the fields as necessary and click OK.

  6. Field Description
    Note

    Enter any applicable note text.

    Show in Contact Notes

    Select the checkbox to include the note in the patient’s contact notes.

    Note: This checkbox is only applicable if text is entered in the Note field.

    Status

    To change the status of the request, select a new status from the drop-down list.

    Messenger Group / User

    To reassign the request, click the ellipsis next to one of the fields to display the Message Groups or Users List window and select another group or user to reassign the request.

    Important: If a user and message group are both specified, the requests will be assigned to the user only. We recommend you specify either a user or group to avoid confusion.

    Tip: As a quick way to assign the request to yourself, you can right-click the request in the Personal Planner and select Assign To Me.