|
You can add clinical notes from many places in the EHR module. Depending on how it is added, the clinical note may be a basic note, a treatment-specific note, or a tooth-specific note.
- Select a patient and open the EHR module.
- Complete any of the following to display the Note Type window:
 Add a Treatment-Specific Note Add a Treatment-Specific Note
- Click the Tx History tab, the In Progress tab, or open the Chart Add tab.
- Right-click a treatment and select Add Tx Note…
Add a Tooth-Specific Note
- Select a tooth on the odontogram.
- Right-click the odontogram and select Tooth Notes/Conditions to display the Tooth Notes/Conditions window.
- Click the Add a new Note (
 ) icon. ) icon.
- From the Select Note Type window, select the appropriate radio button and click OK.
- General Note
- SOAP Note
- Template Notes
- Complete the note using the steps outlined in the sections below.
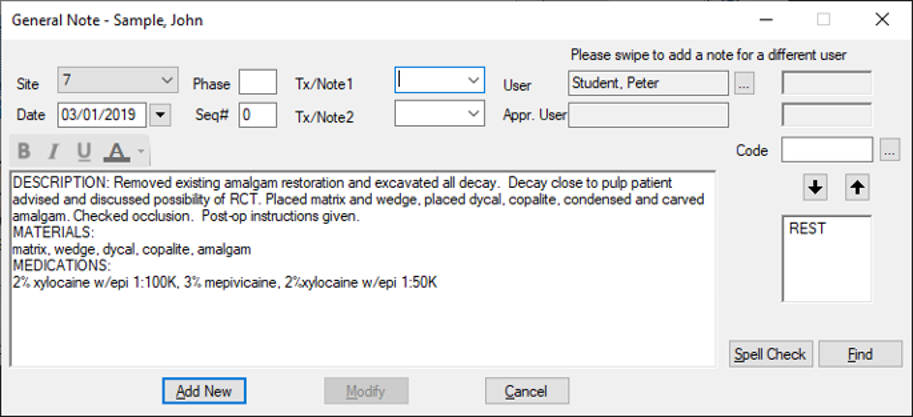
Enter General Notes
- Open the General Note window using a method outlined above.
- Complete the fields as necessary.
| Site
|
If applicable, select the Site the note applies to.
Note: If adding a tooth-specific note, this field is auto-populated.
|
| Date
|
This defaults to the current date.
If you have access, you can change the date as necessary.
|
| Phase / Seq#
|
If entering a treatment-specific note, these are auto-populated with the Phase and Seq# from the treatment record.
|
| Tx/Note1, Tx/Note2
|
These are custom fields. If configured by your institution, they display with the specified name.
Enter the appropriate information or select from the drop-down list.
|
| User
|
This defaults to the logged-in user. If you have access, you can change the user as necessary. |
| Appr. User
|
This displays the approval user.
- If you do not require approval, your information displays.
- If you require approval, this field is blank until your note is approved.
|
- Enter the note’s content using one of the following:
-
Manually enter the contents in the main text field.
-
Click the Code ellipsis to select a pre-defined note code(s).
The note code contents display in the main text field.
Note: If text is already in the main text field, the pre-defined text is inserted at the cursor’s location.
-
Format the note as necessary.
| Bold | Select a portion of text and click the Bold ( ) icon. ) icon. Tip: You can also press Ctrl + B to bold the text. Example: The selected text is bolded. | | Italics | Select a portion of text and click the Italics ( ) icon. ) icon. Tip: You can also press Ctrl + I to italicize the text. Example: The selected text is italicized. | | Underline | Select a portion of text and click the Underline ( ) icon. ) icon. Tip: You can also press Ctrl + U to underline the text. Example: The selected text is underlined. | | Color | Select a portion of text, click the Color ( ) icon, and select a color from the drop-down arrow. ) icon, and select a color from the drop-down arrow. Example: The selected text displays in color. |
-
Click Add New to save the note.
Note: If configured, the Check Spelling window displays, allowing you to confirm/correct spelling in the note.
-
If necessary, obtain approval.
Enter SOAP Notes
Note: SOAP stands for Subjective, Objective, Assessment, and Planned.
- Open the SOAP Note window using a method outlined above.
- Complete the fields as necessary.
| Date
|
This defaults to the current date.
If you have access, you can change the date as necessary.
|
| Tx/Note1, Tx/Note2
|
These are custom fields. If configured by your institution, they display with the specified name.
Enter the appropriate information or select from the drop-down list.
|
| User
|
This defaults to the logged-in user. If you have access, you can change the user as necessary. |
| Appr. User
|
This displays the approval user.
- If you do not require approval, your information displays.
- If you require approval, this field is blank until your note is approved.
|
- Enter the note’s content using one of the following:
-
Manually enter the contents in each area.
-
Click the Code ellipsis to select a pre-defined note code(s).
The note code contents display in the corresponding area.
Note: If text is already in the area, the pre-defined text is inserted at the cursor’s location.
-
Format the note text as necessary.
| Bold | Select a portion of text and click the Bold () icon. Tip: You can also press Ctrl + B to bold the text. Example: The selected text is bolded. | | Italics | Select a portion of text and click the Italics () icon. Tip: You can also press Ctrl + I to italicize the text. Example: The selected text is italicized. | | Underline | Select a portion of text and click the Underline () icon. Tip: You can also press Ctrl + U to underline the text. Example: The selected text is underlined. | | Color | Select a portion of text, click the Color () icon, and select a color from the drop-down arrow. Example: The selected text displays in color. |
-
Click Add New to save the note.
Note: If configured, the Check Spelling window displays, allowing you to confirm/correct spelling in the note.
-
If necessary, obtain approval.
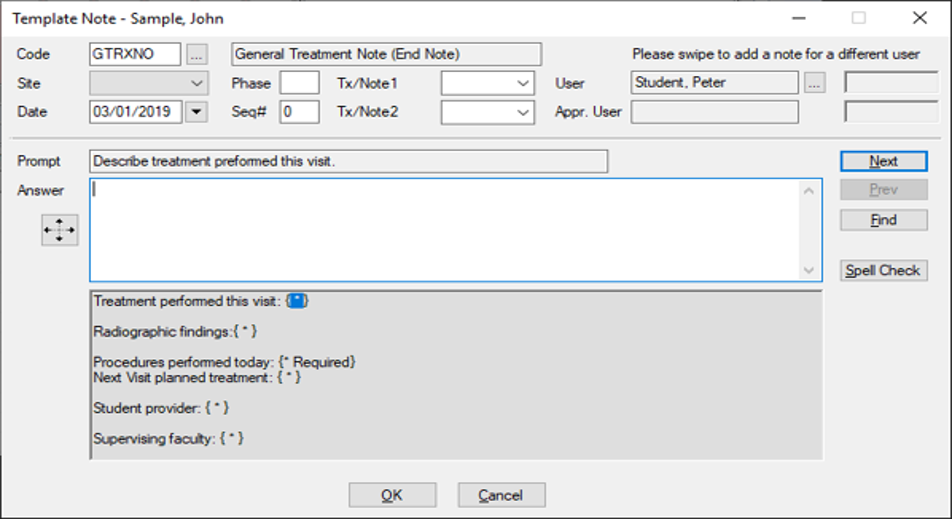
Enter Template Notes
- Open the Template Note window using a method outlined above.
- Complete the fields as necessary.
| Code
|
Enter the template code for this note.
This is used to display the framework for the note and prompts you to enter information.
|
| Site
|
If applicable, select the Site the note applies to.
Note: If you are adding a tooth-specific note, this field is auto-populated.
|
| Date
|
This defaults to the current date.
If you have access, you can change the date as necessary.
|
| Phase / Seq#
|
If entering a treatment-specific note, these are auto-populated with the Phase and Seq# from the treatment record.
|
| Tx/Note1, Tx/Note2
|
These are custom fields. If configured by your institution, they display with the specified name.
Enter the appropriate information or select from the drop-down list.
|
| User
|
This defaults to the logged-in user. If you have access, you can change the user as necessary. |
| Appr. User
|
This displays the approval user.
- If you do not require approval, your information displays.
- If you require approval, this field is blank until your note is approved.
|
- Enter the note’s content:
-
Each prompt in the template will provide you space to enter the appropriate information in the Answer field.
-
Click Next and Previous to move through the prompts and enter the content of the note.
-
Click OK to save the note.
Note: If configured, the Check Spelling window displays, allowing you to confirm/correct spelling in the note.
-
If necessary, obtain approval.
|